
Monday to Saturday - 9am - 5:30pm
Home Assistant Energy Monitoring: Setting Up Power Meters and Smart Plugs
Posted by

Matthew
Introduction
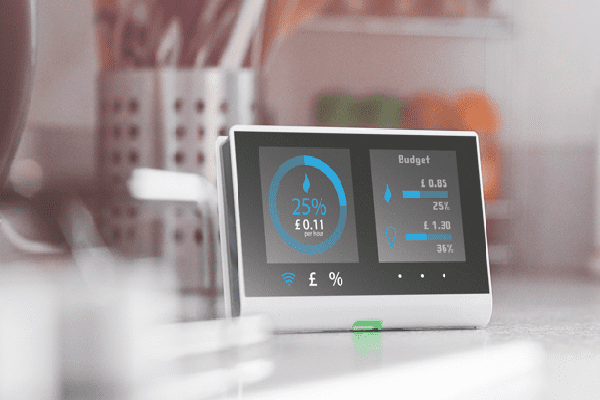
With the increasing focus on energy efficiency and sustainability, monitoring and managing energy consumption in your home has become essential. Home Assistant provides a powerful platform for tracking, visualizing, and optimizing energy usage through the integration of energy-monitoring smart plugs and smart meters. This guide will walk you through the process of setting up energy monitoring in Home Assistant, enabling you to gain insights into your household’s energy consumption and create automations to reduce waste.
What You Will Need
- Home Assistant Installed on a Raspberry Pi or another compatible device
- Energy-Monitoring Smart Plugs (e.g., TP-Link Kasa HS110, Shelly Plug, Sonoff S31)
- Smart Meter integration (e.g., using the Shelly EM, Emoncms, or other energy monitors)
- Electricity Consumption Data from your energy provider (optional but useful for baseline tracking)
- Computer or Mobile Device to access the Home Assistant dashboard
Step 1: Choosing and Setting Up Energy-Monitoring Devices
Selecting Smart Plugs with Energy Monitoring
Energy-monitoring smart plugs allow you to track the power consumption of specific devices. Look for plugs that provide real-time data on wattage, voltage, and total energy consumption. Popular options include:
- TP-Link Kasa HS110/HS300
- Shelly Plug S
- Sonoff S31
Installing and Pairing Smart Plugs
- Plug in the Smart Plug to a power outlet and connect it to the appliance or device you want to monitor (e.g., a TV, refrigerator, or computer).
- Connect the Smart Plug to your Wi-Fi network using its dedicated app (e.g., Kasa or Shelly Cloud).
- Open Home Assistant and navigate to Settings > Devices & Services > Add Integration.
- Search for the smart plug’s integration (e.g., TP-Link Kasa or Shelly) and follow the prompts to connect Home Assistant to the plug.
- Once connected, the smart plug will appear as a device in Home Assistant, displaying power consumption metrics.
Setting Up a Smart Meter (Optional)
For whole-home energy monitoring, you can use a smart meter device like the Shelly EM or an integration with your utility provider’s smart meter data.
- Install the Shelly EM according to the manufacturer’s instructions, connecting it to your electrical panel.
- Integrate the Shelly EM into Home Assistant by adding the Shelly integration.
- In Home Assistant, navigate to Settings > Devices & Services > Add Integration and search for Shelly.
- Follow the setup prompts to connect the Shelly EM, allowing Home Assistant to gather real-time and historical power consumption data.
Step 2: Integrating Energy Data in Home Assistant
Adding Sensors to Track Energy
Home Assistant allows you to create sensors to monitor energy usage from smart plugs and meters:
- Open Home Assistant and go to Settings > Devices & Services.
- Select your smart plug or energy meter device.
- Under the device’s settings, enable monitoring of key metrics such as current power consumption (W) and total energy used (kWh).
For custom devices, you can manually define sensors in the configuration.yaml file:
yamlCopy codesensor:
  - platform: integration
    source: sensor.shelly_plug_power
    name: "Total Energy Used"
    unit_prefix: k
    round: 2
This configuration creates a new sensor named “Total Energy Used” that aggregates the energy consumed over time.
Step 3: Creating an Energy Dashboard in Home Assistant
Enabling the Energy Dashboard
Home Assistant includes a built-in Energy Dashboard for visualizing power consumption. To set it up:
- Go to Settings > Dashboards > Energy.
- Click Add Consumption to add sensors for tracking energy consumption. Select your smart plugs, smart meters, or manually defined sensors.
- Configure the Solar Production and Return to Grid options if you have solar panels and wish to monitor their impact on your energy usage.
- Save and navigate to the Energy Dashboard to view real-time data and historical trends.
Visualizing Energy Usage with Custom Graphs
You can further customize your energy dashboard using Lovelace cards to display detailed graphs:
- Go to Settings > Dashboards and click Add Card.
- Choose the Graph Card and select the relevant energy sensors.
- Configure the card to display daily, weekly, or monthly trends, and use different colors to differentiate devices.
This approach allows you to easily spot high-energy devices or spikes in consumption.
Step 4: Creating Energy-Saving Automations
Automating Power-Off for Idle Devices
One effective way to reduce energy consumption is by automating the power-off of idle devices:
- Go to Settings > Automations & Scenes in Home Assistant.
- Click Create Automation and select Start with an Empty Automation.
- Set the Trigger to detect if a device’s power consumption drops below a certain threshold (indicating it’s idle). For example, set the trigger to:
- Device: Smart Plug
- State: Power below 2W for 10 minutes
- Define an Action to Turn off the smart plug or send a notification to your phone.
- Save the automation and test it to ensure it works as expected.
Scheduling Power Usage
You can create automations to turn off non-essential devices during peak energy hours:
- Go to Settings > Automations & Scenes.
- Create an automation that triggers based on the time of day or peak hours.
- Define actions such as turning off lights or smart plugs during those times to conserve energy.
Step 5: Tracking and Reducing Energy Use
Setting Energy Consumption Goals
Home Assistant’s Energy Dashboard allows you to set targets for energy usage:
- Go to the Energy Dashboard and click Settings.
- Define your target daily or monthly consumption based on historical data or personal goals.
- Monitor the dashboard regularly to ensure that you’re staying within your target and adjust automations as needed.
Receiving Notifications for High Consumption
You can set up notifications if energy consumption exceeds a certain level:
- Create a new automation in Home Assistant.
- Set the Trigger based on a sensor’s total energy usage.
- Define an Action to send a notification or message to your phone, email, or smart speaker.
For example:
yamlCopy codeautomation:
  - alias: "High Energy Consumption Alert"
    trigger:
      platform: numeric_state
      entity_id: sensor.total_energy_used
      above: 15
    action:
      service: notify.mobile_app_yourphone
      data:
        message: "Warning: High energy usage detected!"
Step 6: Integrating with Utility Provider Data (Optional)
Some utility providers offer APIs or services to access real-time and historical energy consumption data. If your utility provider supports this:
- Look for a Home Assistant integration compatible with your utility provider (e.g., Emoncms, Enedis).
- Add the integration in Settings > Devices & Services.
- Use the new sensors in your Energy Dashboard to compare your meter readings with Home Assistant’s data.
Conclusion
By setting up energy monitoring in Home Assistant, you can gain valuable insights into your household’s energy consumption and make informed decisions to reduce waste. With smart plugs and meters providing real-time data, custom dashboards to visualize trends, and automated actions to optimize usage, you’ll be well on your way to creating an energy-efficient smart home.
Home Assistant’s flexibility allows you to expand your setup with additional sensors and integrations over time, giving you complete control over your energy usage and making your home smarter and more sustainable.
Share:
Share: