
Monday to Saturday - 9am - 5:30pm
Creating a Smart Lighting System with Home Assistant and Zigbee Devices
Posted by

Matthew
Introduction
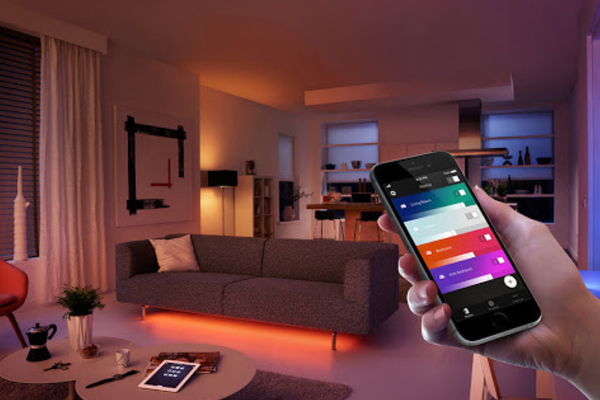
Smart lighting is one of the easiest and most impactful ways to automate your home. By using Home Assistant with Zigbee-enabled devices, you can achieve seamless control of lights, set up custom schedules, create mood-based scenes, and trigger actions based on motion or environmental factors. This guide will help you create a smart lighting system using Home Assistant as your hub and Zigbee devices for wireless communication.
What You Will Need
- Home Assistant Installed (on a Raspberry Pi 4 or another compatible device)
- Zigbee 3.0 USB Dongle Plus (ZBDongle-E) or another Zigbee coordinator
- Zigbee Smart Bulbs (such as Philips Hue, IKEA TRÅDFRI, or Sengled)
- Zigbee Smart Switches or Dimmers
- Motion Sensors (optional, for automation triggers)
- Smart Plugs (for controlling lamps or non-smart lights)
Step 1: Setting Up Zigbee with Home Assistant
If you haven’t already set up a Zigbee coordinator, follow these steps:
- Plug in the ZBDongle-E to your Home Assistant server (e.g., Raspberry Pi) and use a USB extension cable to position it away from the main device to avoid interference.
- Open Home Assistant and navigate to Settings > Devices & Services > Add Integration.
- Select Zigbee Home Automation (ZHA) and choose your USB dongle as the coordinator. The path will be something like
/dev/ttyUSB0or/dev/ttyAMA0. - Finish the setup to enable the ZHA integration.
Step 2: Adding Zigbee Smart Bulbs
Pairing Smart Bulbs
- Turn on the Zigbee Smart Bulbs: Make sure your bulbs are reset to factory mode (refer to the bulb’s manual). They will automatically enter pairing mode when turned on.
- In Home Assistant, go to Settings > Devices & Services > ZHA and click Configure.
- Click Add Device and wait for Home Assistant to discover your smart bulb. Once found, give the bulb a recognizable name like “Living Room Lamp.”
- Save and test the bulb to confirm that it responds to on/off commands from Home Assistant.
Grouping Smart Bulbs
For more cohesive control, you can group smart bulbs into rooms or sections:
- Go to Settings > Devices & Services > ZHA > Groups.
- Create a new group, name it (e.g., “Living Room Lights”), and select the bulbs you want to include.
- Now, you can control all lights in the group with a single command, which simplifies automation creation.
Step 3: Setting Up Smart Switches and Dimmers
Adding Smart Switches
Zigbee smart switches or dimmers are ideal for controlling lights manually while still keeping them connected to your automation system. Pairing them is similar to the bulbs:
- Place the smart switch in pairing mode as per the manufacturer’s instructions.
- In Home Assistant, go to ZHA and select Add Device.
- Wait for the switch to be discovered, then assign it a name like “Bedroom Switch.”
- Save and verify the switch’s functionality.
Step 4: Automating Your Lights with Motion Sensors
Adding Motion Sensors
Motion sensors can automatically turn on lights when someone enters a room and turn them off after inactivity. Follow these steps to add a motion sensor:
- Place the motion sensor in pairing mode.
- In Home Assistant, navigate to Settings > ZHA > Add Device and pair the sensor.
- Give the sensor a name like “Hallway Motion Sensor.”
Creating an Automation for Motion-Activated Lights
Now, let’s create an automation to turn on the lights when the sensor detects movement:
- Go to Settings > Automations & Scenes.
- Click Create Automation and choose Start with an Empty Automation.
- Set up the Trigger: Choose Device and select the motion sensor. Set the trigger to When motion is detected.
- Define an Action: Select Device and choose the light you want to turn on. Set the action to Turn on.
- Optionally, add a Condition to only activate the lights at certain times or when someone is home.
- Save the automation and test it.
Adding a Delay for Turning Off the Lights
- Open the automation you created.
- Add a new Action to the end: Choose Delay and set the time period for how long you want the lights to stay on after no motion is detected (e.g., 5 minutes).
- Add a final Action to Turn off the lights after the delay.
Step 5: Creating Scenes for Different Moods and Activities
Scenes allow you to set up predefined lighting configurations for different activities, like movie nights or reading time. Here’s how to create a scene in Home Assistant:
- Go to Settings > Automations & Scenes > Scenes and click Create Scene.
- Name your scene (e.g., “Movie Night”).
- Add your desired lights and set the brightness and color (if supported) to your preferred settings.
- Save the scene.
You can now activate this scene manually or as part of an automation.
Step 6: Voice Control Integration
For hands-free control, you can integrate Home Assistant with Google Assistant or Amazon Alexa. This allows you to use voice commands to turn on, dim, or change the color of your Zigbee lights.
Integrating Google Assistant
- Go to Settings > Home Assistant Cloud or configure the Google Assistant integration manually using Home Assistant’s documentation.
- Once set up, you can link your Home Assistant account with Google Home.
- After syncing, you can use voice commands like “Hey Google, turn on the living room lights” to control your Zigbee lights.
Step 7: Automating Light Schedules
One of the simplest yet effective automations is scheduling your lights to turn on or off at specific times. Here’s how to do it:
- Go to Settings > Automations & Scenes and click Create Automation.
- Choose Time as the Trigger and set the desired time for your lights to turn on (e.g., 6:00 PM).
- Define the Action to Turn on the chosen lights.
- Save and test the automation.
You can also create separate automations to turn off the lights at a specific time, such as 11:00 PM.
Step 8: Monitoring and Optimizing Your Smart Lighting
Checking Zigbee Signal Strength
It’s essential to ensure that your Zigbee devices maintain a strong and stable connection:
- Install the Zigbee Network Map add-on from Home Assistant’s add-on store.
- Open the add-on and view the network map to identify weak or disconnected devices.
- Consider adding powered Zigbee devices (like smart plugs) to strengthen your mesh network.
Creating Energy-Saving Automations
Home Assistant’s Energy Dashboard allows you to track and optimize your energy consumption. You can add automations to turn off unnecessary lights or set up notifications when certain energy usage thresholds are crossed.
Conclusion
Setting up a smart lighting system using Home Assistant and Zigbee devices gives you complete control over your home’s ambiance, convenience, and energy usage. With the right combination of smart bulbs, switches, and sensors, you can automate lighting based on motion, schedules, or even voice commands. This guide provides the foundation to expand your smart lighting setup, allowing you to explore new possibilities in home automation.
Share:
Share:
Related Posts

Getting Started with Zigbee Using the Zigbee 3.0 USB Dongle Plus (ZBDongle-E)
Zigbee is a reliable, low-power wireless protocol ideal for building a smart home network. This guide explains how to set up the Zigbee 3.0 USB Dongle Plus (ZBDongle-E) with Home Assistant to control a range of smart devices. You’ll discover how to connect the dongle, pair devices using the built-in...
Continue Reading
Getting Started with Home Assistant on a Raspberry Pi 4
Home Assistant is a powerful open-source platform that allows you to control and automate various smart devices within your home. This guide walks you through setting up Home Assistant on a Raspberry Pi 4, making it an affordable and flexible hub for managing smart devices. You’ll learn how to install...
Continue Reading